

Breadboard vs stripboard
Which is the best method for building prototype circuits? Breadboard vs stripboard, which is better? In this article, I’ll explain the advantages and disadvantages of each method. By the end of it, you’ll be able to make a considered choice as to which is best for you or a particular circuit or experiment.
Also check out my post, Breadboards – the complete guide, for everything you need to know about breadboards.

I make fewer mistakes when using stripboard than with breadboard
This is down to my counting and eyesight. As much as I check and double-check, the fact remains that after building circuits on breadboards and on stripboards I get more errors on breadboards.
I destroyed an IC last week by swapping it. When I put the new one on it was one hole away from where it should have been. That was enough for it to get hot and not work again.
Had this been on stripboard it would have been in a socket so I couldn’t have put it in the wrong place ( I could have put it in backwards though!)
Even though I plan out where the components go it easy for me to miscount .1 inch spacing’s on a breadboard.

When I build stripboard circuits I use the Lochmaster software on my laptop to plan out and design the layout. The screen is more magnified and miscounting isn’t as much of a problem.
I then check the printout with the circuit using a highlight pen and if that’s correct I do another printout to scale. Then I cut it out and stick it to the stripboard as a component overlay. If you are interested in the Lochmaster software you can check out what I think of it here.
I built four identical large stripboard constructions using this method and all four worked the first time. It’s a lot easier with a component overlay. There’s no way I could have built four large breadboard layouts without a single error.
Strip boards are more permanent
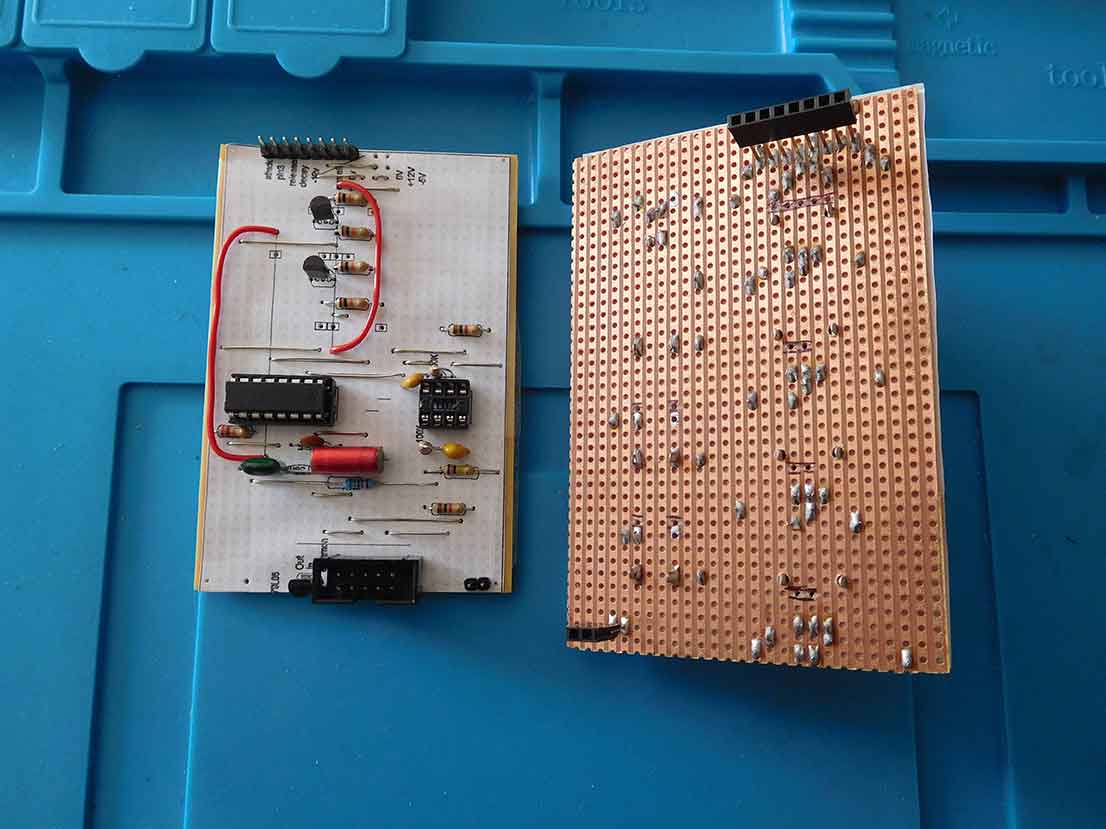
The fact that the components are soldered makes the circuit more permanent than if you built it on a breadboard. If you are clever in the way you plan the circuit, a stripboard layout can be as “finished” as a PCB layout.
There are things you can do such as try to mount the resistors flat on the board rather than “upright” where they can get bent and touch other components. I built a sequencer on stripboard over twenty years ago and it’s still working. Some of the potentiometers are wearing a bit but that’s the mechanical nature of the component rather than the fact it was built on a stripboard.
So if you take the time to plan your prototype circuit on stripboard you may not ever need to transfer it to a PCB.
Breadboards aren’t permanent
If you built a circuit on a breadboard to try it out you can’t really keep it on a breadboard. Certainly not for twenty years of use like my stripboard sequencer.

Sooner or later you’ll want the breadboard for another project even if you just buy another breadboard (this is a good idea in itself to have more than one breadboard.) I’m sure that after a while the connections won’t hold as well as they are sprung and they’ll start to let go meaning the circuit may get a bit “intermittent”.
Information
The modern plastic breadboard in use today, with .1-inch spacing holes was patented in 1971 by Ronald Portugal.
Breadboard connections are higher in resistance
Sometimes a circuit doesn’t work as well as it could on the breadboard. This can be due to the resistance on the breadboard contacts. As I mentioned before and you probably know the connections on the breadboard are sprung and some, after a while, won’t hold some components, as well as they, used to.
Especially ones that have thin legs. Some diodes seem to have thinner legs than other components as do some polystyrene capacitors. The thinner leads mean they don’t get held very well at all.
I recently built a filter circuit and found the frequency jumped around a lot while I was testing it. When I pushed around with some of the components on the board the frequency dropped. This was more than likely due to the problem above. Maybe one of the connections was of a higher resistance than it really should have been. You don’t get that with soldered joints if you have made them properly of course but that’s another discussion.

Breadboard circuits are quicker to make
If you’ve read my article “breadboard tips” and you have a bit of breadboard construction experience. You can very quickly knock up circuits. Keep a compartmentalised box of pre-made wire links and some pre-made resistors with a .4-inch spacing and some plug-in potentiometers and presets and you can be building like you can with Lego.
It’s certainly the quickest way of building a prototype circuit that I’ve found. It’s also a lot quicker than stripboard when it comes to swapping components out. If you want to swap a 33K resistor for a 47K one, just pull it out and plug the other in. There’s no de-soldering.
If it’s not quite right, probably a 56K would be better, you just plug that in. It can get a bit frustrating with the stripboard having just put a new value in with the de-soldering that it requires only to realise you’ve got to do it again.
If you want to become an expert at desoldering check out my guide.

Breadboard vs stripboard – You can reuse breadboard components
After building several breadboard prototypes I took the decision to make a component former (again mentioned in my Breadboard tips article) and then keep the preformed components. This means that a 100K resistor that I preformed has been used in the last 4 projects.
The spacing of .4 inches is really useful for links and components. It means they can connect the pins of an IC to the blue and red rails on a breadboard. You can do this either directly with wire links or via resistors.
It’s no use just having the parts in one pot. You’ll never be able to find them when you want. You need to get into the habit of using those compartmentalised storage boxes.
Once you’ve got organised you’ll be surprised at how often you reuse components.

Current and voltage considerations
Don’t use mains voltage on a breadboard it’s just asking for trouble. If you need to use mains voltage on PCB mains transformers or stuff use a stripboard and solder it and house it properly in a plastic box or something suitable.
Also if your using something with a high current don’t use a breadboard. A breadboard is excellent for testing out low-current and low-voltage circuits. You might get away with small low current power supplies but if you’re building a supply using a larger current, the chances are it won’t be suitable to breadboard.
The connections are only meant for low voltage and low current stuff. If you try to exceed what it will take you’ll at best melt it and at worst start a fire. Neither are particularly good options.
Breadboard vs stripboard conclusions
It’s probably clear to you now that there is no answer to the which is better breadboard vs stripboard question. Firstly it comes down to individual choice. Some people get on much better with either breadboard construction or stripboard construction.
You’ll find it hard to persuade them otherwise. Secondly, some circuits are better built on the breadboard and some on the stripboard. If you think you’ll be making lots of changes in component values and for instance, you’re experimenting with resistor values you might find it easier using a breadboard layout.
If you’re making a circuit that you’re not planning on changing much with half an eye on keeping it, you might be able to build it permanently on the stripboard.

On the whole, both breadboards and stripboards are useful in their own right. Each method has its advantages and disadvantages. It depends on each situation and circuit. If you’ve been building electronic circuits for a while you’ll probably find like me you use both methods of construction.
If you would like some more information and some helpful tips on using stripboard check out my post How to use veroboard.
For more information and some helpful tips on using breadboards check out my posts Breadboard tips and How to build a circuit on a breadboard.

“Hi, I’m Graham Moore and I’ve been building electronic projects since I was 12. I had a fascination for old radios and taking them to pieces but when my Nan bought me an electric soldering iron, I realised with a few components I could build stuff.
Learning to solder opened up many doors for me as electronics also became a career. I hope you get as much from it as i did”.
Breadboard design software

Breadboard design software tested and compared If you use breadboards, you might find breadboard design software helps with your building. Breadboards are tremendously useful for beginners who can’t solder…
Breadboard tips

Breadboard tips I learnt to use breadboards in a sort of trial-and-error method. There doesn’t seem to be much in the way of instructions on how to use a breadboard….
Best breadboard kit buyers guide

Best breadboard kit buyers guide In this “Best breadboard kit buyers guide”, I’ll attempt to point you in the direction of the kit that best suits you. Breadboard kits come…
Common breadboard mistakes

Common breadboard mistakes If your breadboard circuit doesn’t work don’t worry you are not the first and won’t be the last. Fortunately, there are a lot of common breadboard mistakes…
Where to buy breadboards

Where to buy breadboards So if you’ve found this page that means you’ve probably decided you want to buy a solderless breadboard and you want to know where to buy…