

How to test a capacitor
Firstly before you test a capacitor you should be very aware that you could get a shock from a particular type of capacitor. Especially if they are from switched-mode power supplies. That includes power supplies from computers or laptops. Even if they are unplugged you can still get an electric shock from them as capacitors can keep a charge for quite a while, even days.
Digital cameras can also give you a shock as they have a capacitor that is used in the flash circuitry.
If you are not sure then don’t mess about with anything. There are plenty of other applications with high voltages and capacitors storing charges.
If you are competent with electronics and you have an appliance that you want to check, then you can disconnect it and discharge the capacitors.
For more information, I have an article What is a capacitor and how does it work?
How to safely discharge capacitors.
If capacitors are small value ones then you can just short the two leads together with something metal. By small value, I would say less than 100uF. The charge that they hold will only be small. The larger the value the more problems there will be with the charge they can hold.
Anything more than 100uF may cause problems but above value, I would discharge them safely.
When you discharge a capacitor you release all the energy that it holds all at once. If you short the leads together small charges won’t even be noticeable but larger charges and larger currents will cause sparks. A lot of people use a metal screwdriver blade to short the two leads together. This can cause a spark that is large enough to make a mark on the screwdriver blade.
You can discharge a capacitor safely by slowing down the discharge rate. Use something that isn’t a very low resistance like a metal screwdriver blade. If you have something with a higher resistance, the current will slowly discharge and you won’t get a spark or a bang. The spark of the discharge can also cause damage to printed circuit boards as well and that’s not something you want.
Can you use a resistor to discharge a capacitor?
Yes, but again the resistor will have to be able to dissipate the charge so if the charge is big it could easily just burn out a small resistor. By small I mean a low-wattage resistor like 1/4 or 1/8th of a watt that you would use on a PCB. You’d have to use a 5 or 10-watt one depending on what size of capacitor you were discharging.
Years ago large wattage resistors used to be commonplace in electronics but not so much these days so if you haven’t got one lying about it could prove to be quite expensive to get hold of one. I know the next question you’re going to ask. Is there something else lying around I could use? Well yes, there is.
Using a light bulb to discharge a capacitor
A light bulb is a good alternative to a large-wattage resistor. If you use something like a 100W filament light bulb the resistance of the filament will discharge a large value capacitor carrying a large charge without causing a damaging spark or electric shock. If the capacitor has a large charge at a high voltage you may see the bulb light up and dim. Once it has dimmed the bulb has used the charge the capacitor was carrying and is safely discharged.
If you make something like the resistor or bulb capacitor discharger obviously you can’t come into contact with the capacitor leads or the resistor or bulb as the capacitor will be discharging through you!
So if you make a capacitor discharger use the thick cable to connect up to the resistor. Use insulation on the bare resistor leads or use an insulated bulb holder. The ones that hold lamps are ideal as they are already insulated.
Use some thick wire and just hold the plastic insulation. Then touch the bare end of each wire to the two capacitor terminals. This will discharge the capacitor safely without a spark. You can always check if a capacitor has been discharged with a multimeter. Just set it to DC volts and put the probes across it. If you read any voltage the capacitor hasn’t been properly discharged.
If you need information about desoldering a capacitor you can read my guide Learn how to desolder – A beginners guide.
Visually check a capacitor
With large-value electrolytic capacitors, there is often visual damage that you can spot before you even do a test. A few years ago there were a lot of capacitors manufactured that have since become faulty.
They are quite easy to spot as they swell up causing a bulging and sometimes leaking out of the top or bottom of the can. If you see any like that just replace them because even if they test OK they won’t last much longer and can cause even more problems in a circuit.
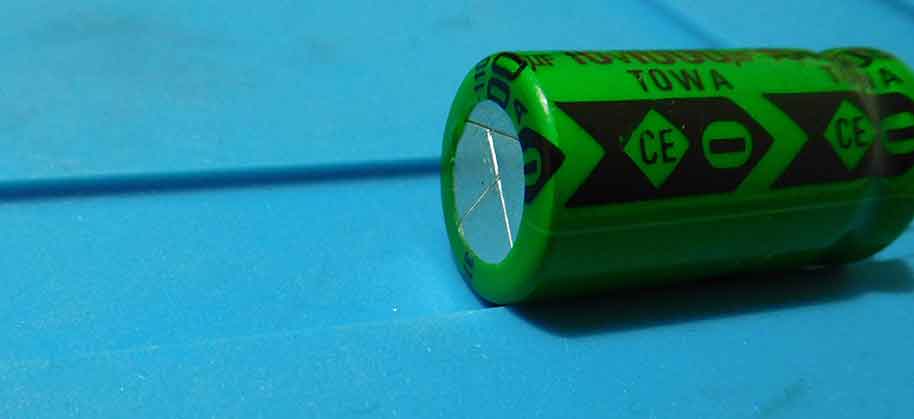

The two pictures above show a perfectly good capacitor with no bulge or leak.
Continuity beep test
If you have a continuity test on your multimeter you can give the capacitor a test. A small value capacitor less than 1uF won’t read or beep. If you get a continuous beep it is short-circuited and no good. A large-value capacitor will beep for a second or so depending on its value. Larger value capacitors will beep for longer. After it stops beeping it won’t beep again until the capacitor has been discharged.
How to test a capacitor with a multimeter
Testing a capacitor with a multimeter is not too difficult if you follow a few steps. The continuity test checks if the capacitor has a short circuit but the next check tests what a capacitor fundamentally does and that’s store a charge. You will also need a power supply or failing that a 9-volt battery.
Look at the voltage of the capacitor. This is the working voltage of the capacitor and you shouldn’t exceed it. For example, if the voltage is 16 volts a 9 volt battery will be fine to charge it. If you look at a capacitor and the value is above 1 microfarad, which is written as uF. It will usually be polarised so will have a positive and a negative connection. So touch the two legs of the capacitor to the two battery connections positive to positive, negative to negative, for a couple of seconds.

That will be enough to charge the capacitor. It should now be holding 9 volts so if you put a multimeter across the legs you should measure 9 volts. The value that it reads will slowly get lower and lower as the capacitor discharges through the resistance of the multimeter.

If this is what happens the capacitor is working, it charges and discharges.
If it doesn’t charge up you have a problem with the capacitor.
The larger the value of the capacitor the longer it will take to discharge through the multimeter. A small-value capacitor won’t hold a charge for very long. This is the problem with using a multimeter to test a capacitor because you won’t get time to read the charge on a very small value capacitor capacitor.
Capacitor range on a multimeter
Some multimeters have a capacitance range on them so you can check capacitors with that. The meter I have here has a capacitance range however it only goes up to 40 uF. I haven’t used it since I got my component tester. It’s far easier to just plug a capacitor into that. It has zero insertion force sockets and covers a much larger range than the multimeter.
How to measure a capacitor
Large value capacitors are difficult to measure accurately and the value is not usually that critical. They are generally used to store a charge or to smooth direct current when it has come from an alternating source and is uneven. Those applications mean the capacitor will work even if it’s a way off its supposed capacitance. Large-value capacitors are manufactured with a large tolerance anyway meaning they could be 20 percent away from the printed value.
Smaller value capacitors are much easier to measure. A component tester like the one below can measure capacitors up to the value of 10,000uF. They are pretty accurate and pretty cheap. They will also test and measure loads of other components. If you are an electronic hobbyist they are an amazing bit of test kit that I wish I’d had when I first got into electronics.

It will quickly test and measure a capacitor and you will be left in no doubt as to whether it’s working or not. You have to make sure that the capacitor is fully discharged before you connect it to one of this component tester though as a charged capacitor can destroy the tester.
I have just used the component tester to measure the largest value capacitor I can find lying around and that is a 2200uF capacitor. It actually measure 2353uF which seems quite a long way out, but as I mentioned earlier large value capacitors can be within 20% of their value.
A 2200uF capacitor could be 2200 + 220, so 2440uF.
Or 2200 – 220 so 1980uF.
Final thoughts
Hopefully, I’ve shown you how you can test a capacitor with a commonly available multimeter. If that’s all you have and you don’t need to test capacitors very often then it’s ideal.

However if, like me electronics is your hobby a component tester like the one I’ve shown makes much more sense for me. The cost is really cheap between £10 to £20 pounds and you can double-check check values of tiny capacitors that are difficult to read. There is also the fact that you can test loads of other components with it as well.