

CNC software
There are quite a few options when it comes to CNC software as you’ll need different software depending on what you want to do. You can pay for stuff, which a lot of people do, after all these CNC machines can get quite big and costly if you want high precision and the cost of some of these software packages proportionately to the machine isn’t much.
The good news is that it can all be done for free if that’s what you want to do. In fact it’s quite a good idea to try the free stuff first if you’re new to CNC machining like I was. That way you can try out stuff and see what you really need before buying something better.
This was what I intended to do but I’ve found the free stuff so good I’ve not needed to use anything else yet. So what free software can you get and what will it do?
The software you’re going to need to use with a CNC machine can be broken down in to three parts. There are some packages that combine some or all of the three parts together but its best to understand and to be able to do the three things separately to start with.
Free CNC software
1. Design software – to draw the shapes, cuts and hole you want you CNC machine to make.
2. Cam software – to generate the G code from your design software for the CNC machine control software to run.
3 CNC machine control software – to control the movement of your CNC machine and run the G code to get it to cut, drill and engrave.
Design software
If you want to do things from scratch and by that I mean your own designs which eventually most people will want to do, you will need something to draw your designs. What you need is a drawing program that can do vector graphics and export an SVG file.
You’ll need to be able to draw shapes. Sometimes quite complex ones and maybe use text as well if you want to be able engrave text onto your designs for front panels and stuff.
People have used Adobe Illustrator however that is quite expensive and takes quite a lot of learning. The free alternative is Inkscape. It can do loads of stuff but again takes a fair bit of learning but I’d say just persevere and only learn the bits as you need to. You can find YouTube videos to teach you the basics and the more complex stuff you can pick up as and when you need it.
OpenBuilds CAM – GCODE Generator
Once you’ve got your design worked out and saved as an SVG file you need to convert it to GCODE for you CNC machine control software to make your CNC machine cut or engrave the design. The OpenBuilds CAM – GCODE Generator is actually online so opens in your browser of choice. This is the link https://cam.openbuilds.com/
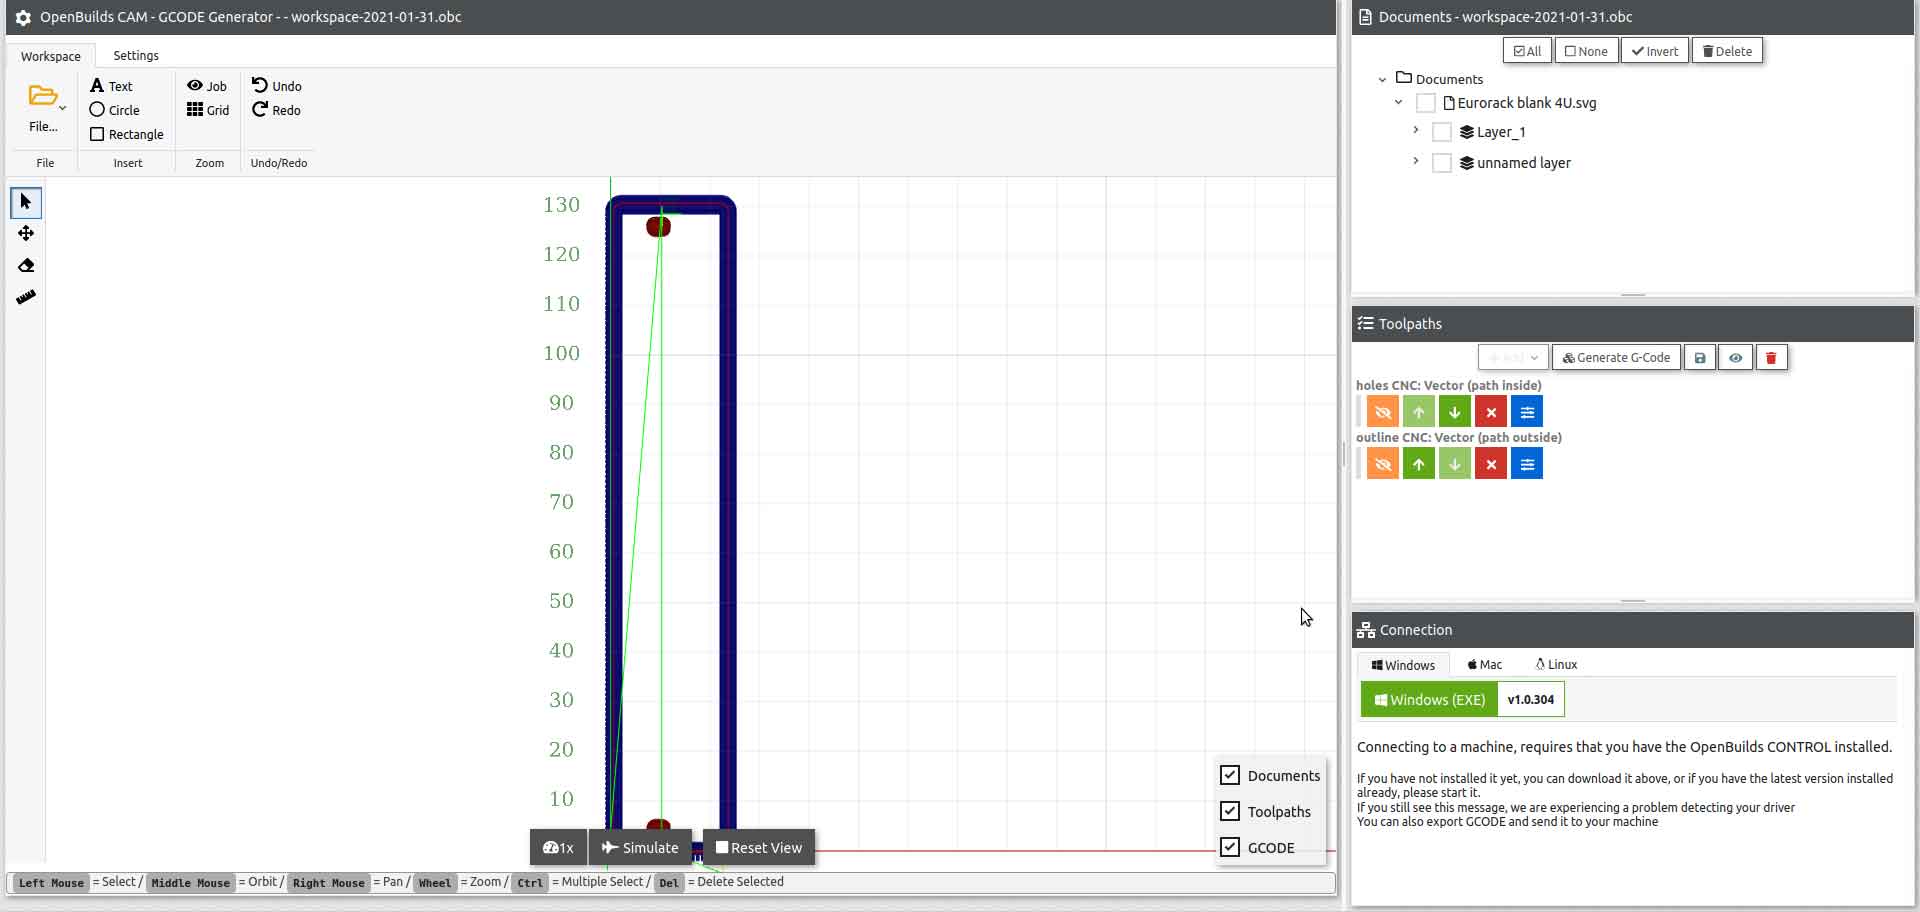
You can open up the SVG file that you previously created in the file menu. It will be displayed on the left side of the screen and each part of the SVG can be selected separately or together to make a tool path out of. For instance if I’ve got a front panel to cut out of 3mm acrylic sheet material using a 2mm diameter cutting tool.
First I’ll import the SVG file for the design that I’ve previously created in my design software. Then click on the holes in the design and select “cut inside” with 2mm tool to a depth of 3mm. Do this with any other shapes like squares that are cut out and do the same “cut inside” with a 2mm tool to a depth of 3mm.
Then select the outline of the panel in your design and select “cut outside” with a 2mm tool to a depth of 3mm.
Once you’ve created these tool paths you can create G code from them. This is what the next piece of software uses to do the actual drilling and cutting.
OpenBuilds CONTROL
Download this free software and run it.
This is a machine interface controller and when it’s running on your laptop it will connect via USB to the Arduino Uno. On its first run it will download a driver, then click on “connect” and various lines of text will scroll along the bottom half of the screen. This is the software I use to control my CNC machine.
There are two tabs along the top, Control and Troubleshooting, click on the Troubleshooting page.
You will now see the inputs and end stops in green. If you have limit switches installed and you can physically operate them with your finger you should see them change to Red / on while you press them. Same with the probe if you have it connected up, the same should happen when you touch the crocodile clip on the metal probe base.
You’ll need to set your CNC machines GRBL settings first. I have an article on GRBL settings here if you need any more information. Once you’ve set your GRBL settings correctly they will stay the same until you change them even when you disconnect the Arduino board. Once I’ve homed the machine I set “Zero XYZ” you will then see all the XYZ numbers go to zero.
You can manually jog the machines X, Y and Z axis. You can switch between “Incremental Jog” and “Continuous Jog”. “Continuous Jog” will only move things while you either click on the screen buttons or press the laptop keyboard. While “Incremental Jog” will move it by the set increment. This can be in inches or millimetres and can be set to 100mm at a time down to .1mm.
You can also use a probe to set the Z height and it can even be used to flatten your workspace which you can read more about here.
It will also do its main function which is to run G code to do all the clever stuff that a CNC machine can do. When running G code you can manually override the feed control to see if you can speed up the cutting.
Using these three pieces of free software you can go from a computer design to a finished article.