

Things you can make from a broken laptop
My laptop had been used to death over the years so I didn’t feel too bad having to get a new one, however, the reason I needed a new one was that the hinges and lid had snapped, so not only could I not close the lid, I haven’t been able to do that for ages anyway, now the screen isn’t even attached to the laptop. It was beyond repair as a few years before the LCD cable had been replaced. Both hinges had now snapped and the bit they fitted on to had cracked away and the LCD was falling out of the lid. There was very little of the case left to glue or bolt together (both remedies that had kept it functioning in the past and extended its working life.)
The only real regret was that the actual innards of the laptop were still working, it was an i5 processor with 8 gigs of ram and with an SSD. So even by today’s standards, not too bad a machine.
Around about the same time I was looking to get a music keyboard, one that I could use to write stuff on. I previously had a small studio but there was no space for that now so something like a workstation looked ideal.
The problems I found trying to get something suitable were.
Price, the more I wanted the machine to do the higher the price was and secondly I really didn’t want to have to learn how to program a new synthesiser, drum machine and with mixing and effects. Even worse was the thought of learning a new sequencer. I could visualise spending a fortune and then not having the enthusiasm to learn how to properly use it. Especially considering the time I’ve spent in the past learning the software sequencers, synthesisers, samplers, drum machines and effects units.
What I actually needed was a workstation that you could run your own software on, something that you could run Windows on and then load your own sequencer and soft synths on. I searched for this beast thinking there must be something available like what I needed but guess what there isn’t.
I just wanted a workstation with a four octave keyboard that could run Windows, then I could load Ableton live. A digital audio workstation that I could already use because I’d already spent hours learning it in the past.
So there I was with two problems. I had a broken laptop that the internals worked OK and I couldn’t find a music workstation that did what I wanted. Yep you must have already guessed what I’m thinking.

So what I wanted was a digital audio workstation that had a four octave music keyboard, a computer keyboard to operate Ableton live and a screen to see what was going on. All in one box and stick in a stereo amplifier and speakers and that would be perfect, portable, turn on and use.
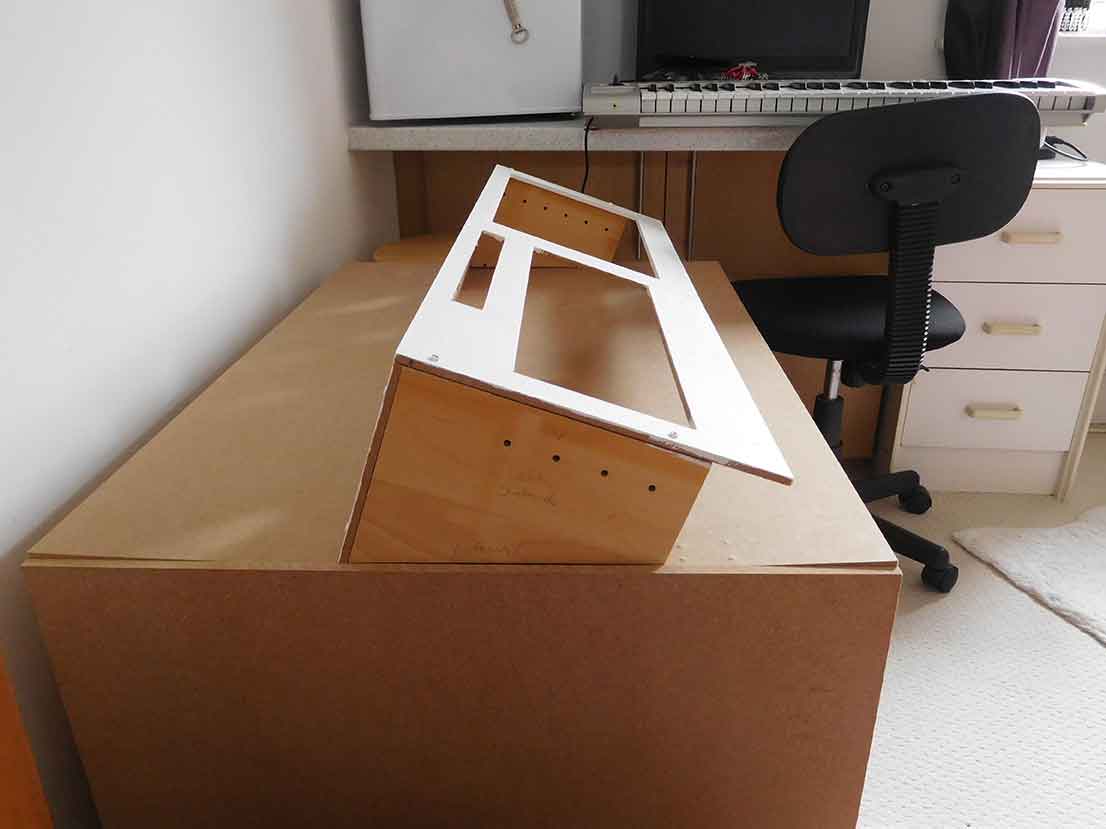
First off I drew up a rough design and decided I would build it out of MDF. Secondly I took the laptop to pieces, not difficult as it was already falling apart. I took out the LCD screen and threw away the other bits of the lid, take out the webcam and keep that though, you can use that for something else in the future.

I then started on the bottom half and took the keyboard and touchpad off and threw them away which left me with basically the motherboard in the bottom half of the case.
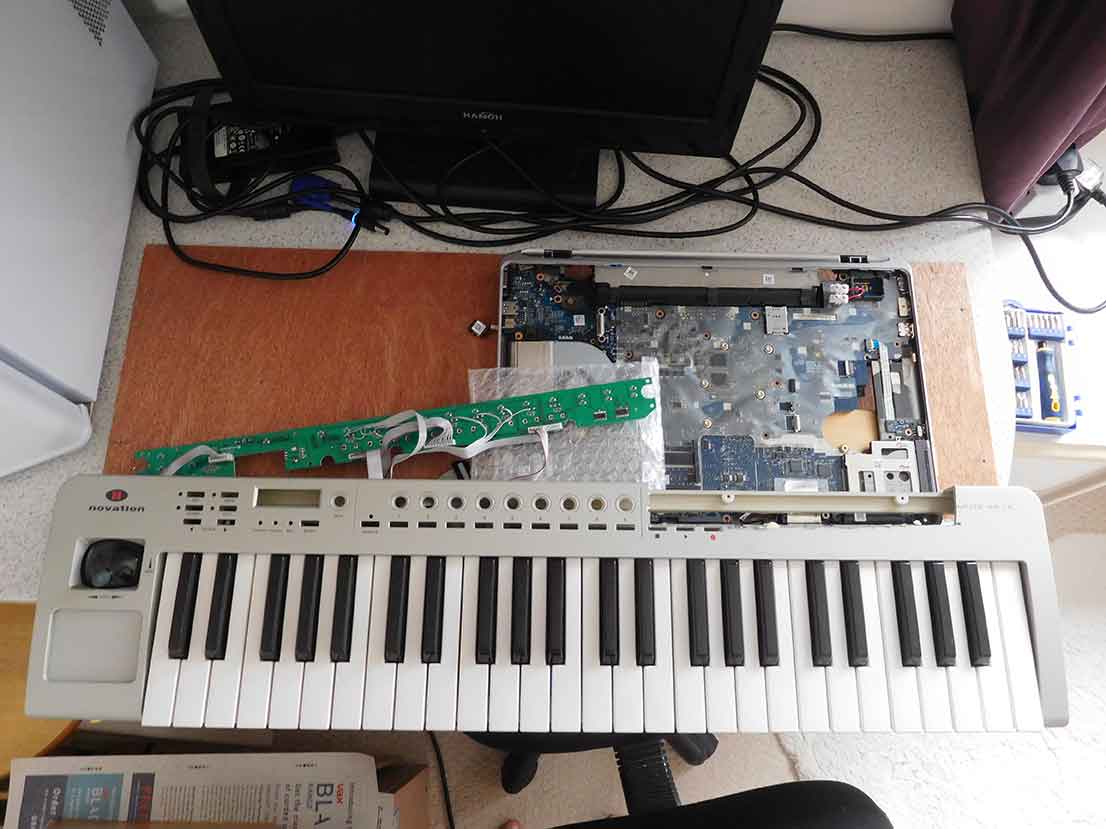
I also had a partially functioning Novation midi controller keyboard, it generated notes and midi messages but the screen just showed garbled characters which made programming a challenge!
This was going to be four octave music keyboard part and had the display and top panel taken off it.
The LCD screen was starting to fail in the top corner and replacements for that particular laptop were quite expensive. I didn’t want to spend a lot of time and trouble building my creation only for the screen to fail and be left having to fork out for expensive replacement. I decided that I would use the screen with a monitor board that would plug into the monitor input of the laptop.
I thought that if I got the LCD panel working with the monitor board, then when the LCD panel gave up it would give me more options of what I could connect to it. There are lots of different 15.6” LCD panels and hopefully something I could salvage for not too much.
This became another article due to it’s size and you can read here Using a laptop screen as a monitor.
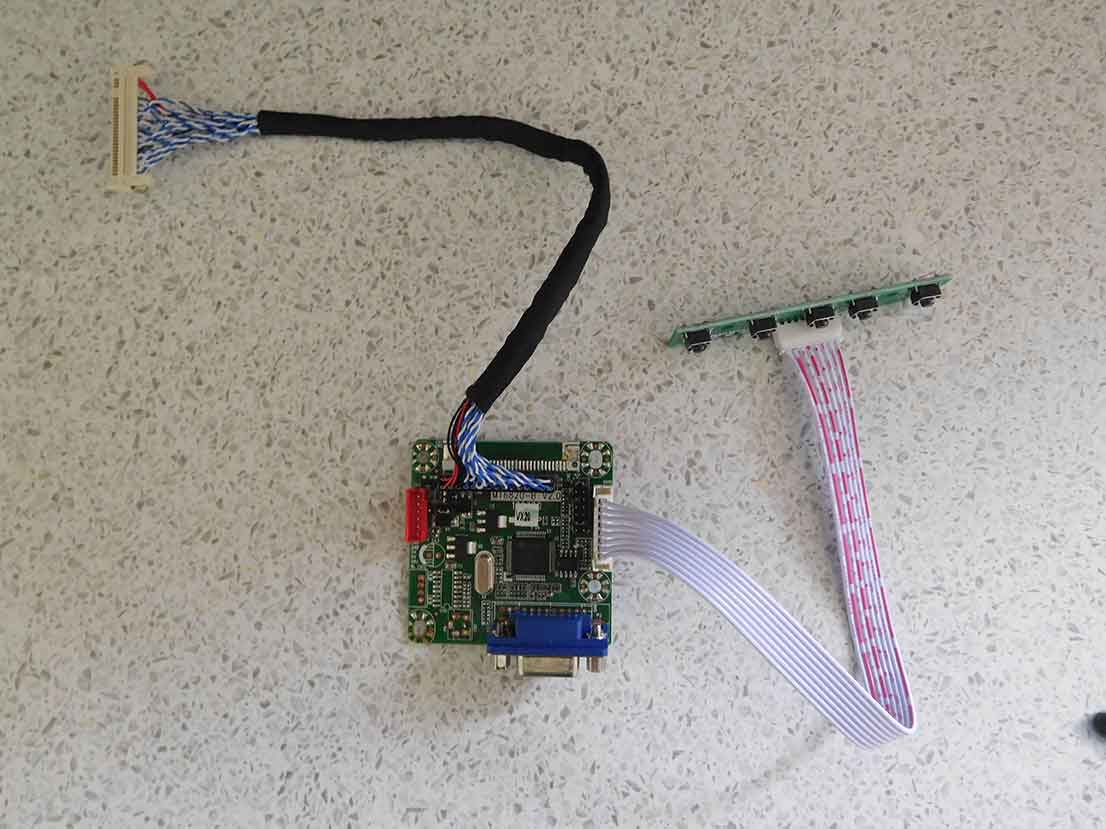
This is the board that I used to interface the laptop to the LCD screen.
I had decided to use an external USB keyboard instead of trying to reuse the laptop keyboard because reusing the existing laptop keyboard left me with two big problems. How I would fit it in my MDF case and how close it would have to be to the laptop motherboard because of the miniature ribbon cable.
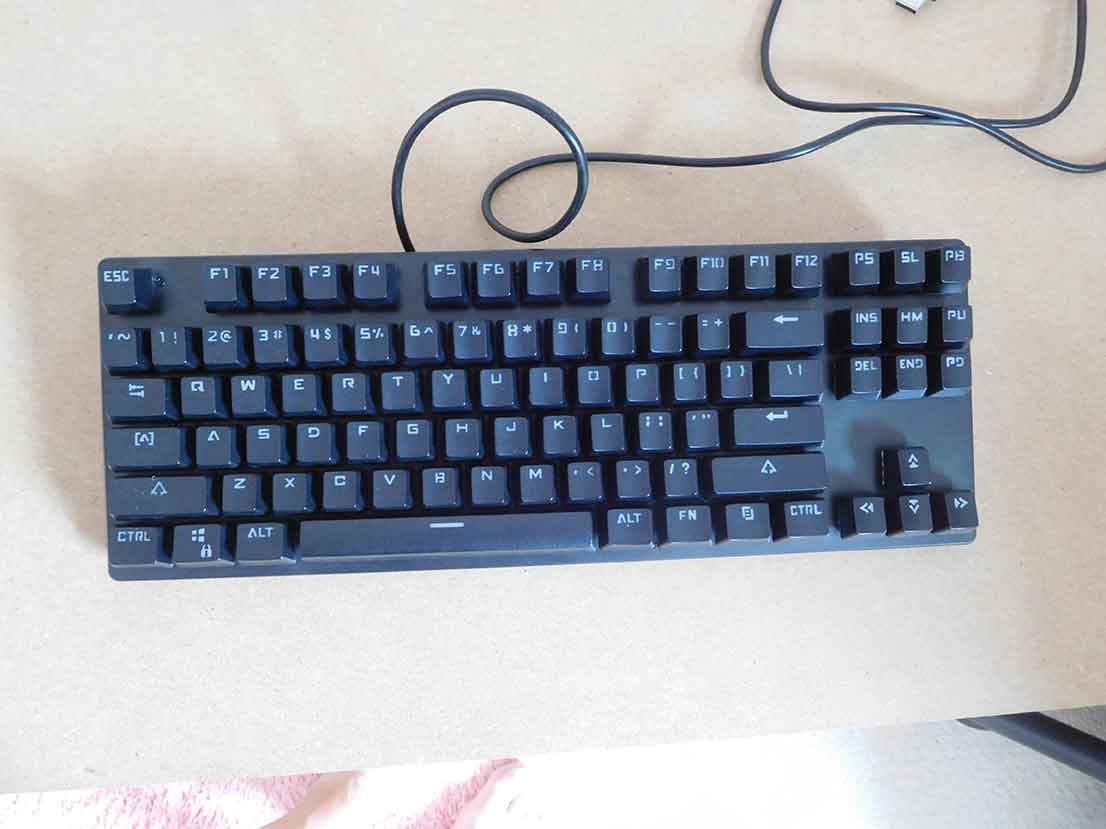
An external USB keyboard would be far easier to use and the prices make it not to much of a problem. I found a USB keyboard that would just drop into a hole cut out of the front panel and I could use a wireless mouse, not being a fan of touch pads anyway.
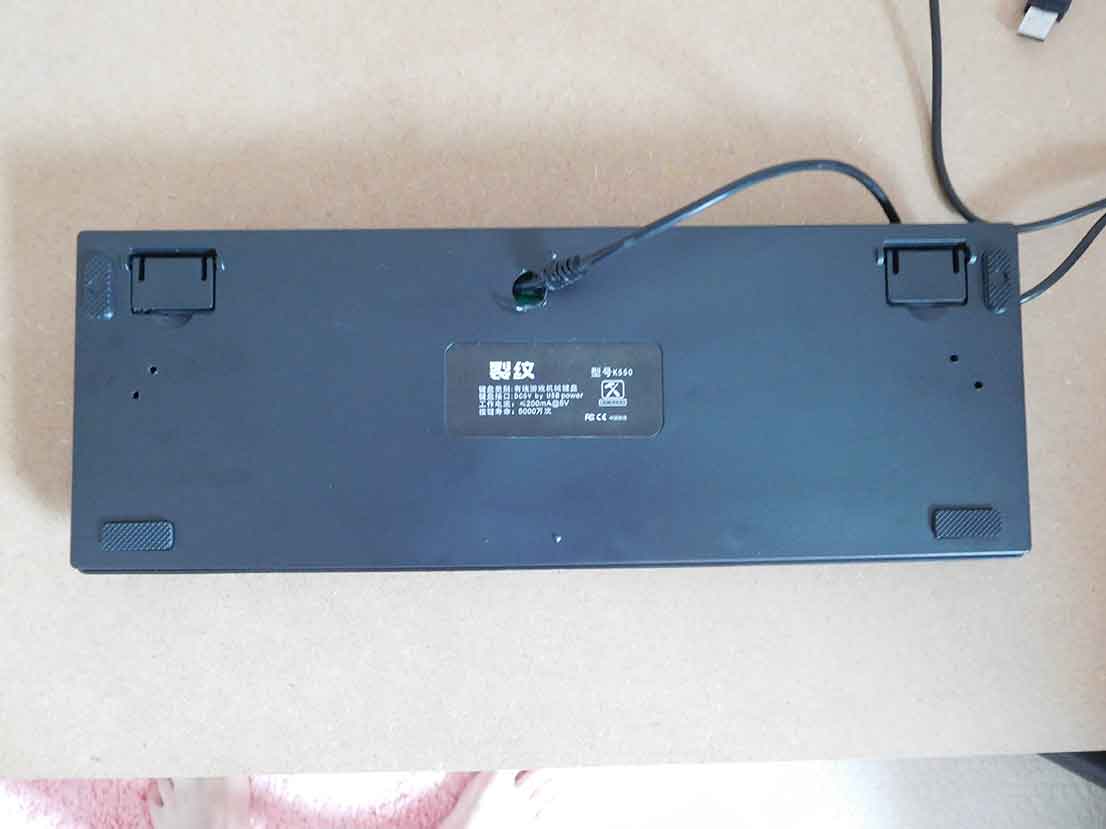
The USB keyboard had the cable come from the side and this got in the way I wanted to use it so I took it apart and drilled a new hole and had the cable come out of the back.

As you can see from the picture above there is a lip around the top half of the USB keyboard so I was able to cut a hole in the front panel for it to drop into.
The LCD panel would mount on the back of the MDF front panel with a square hole cut out for it. All of the these cut outs would be done with my CNC machine.
Do USB extenders or adapters actually work?
One of the problems I was going to have would be a lack of USB sockets on the laptop. I needed one for the USB computer keyboard, one for the dongle for the wireless mouse, one for the Novation controller keyboard and at least one for plunging a USB memory stick in for installing software and saving stuff like backups stuff. Simple I thought I’ll get one of the USB expansion boxes, one plug and a number of sockets mounted in a little box. So I got everything together to give it a test and couldn’t get my USB stuff to work. It was all plugged into the USB box so I unplugged it and tried again. Each USB device was working so it must be the box. I plugged the box back into the computer USB port and plugged the mouse in on its own and it worked so I moved it to each USB socket and it worked on each separate USB socket. I then plugged in the USB keyboard and neither worked.
I then found the mouse, keyboard, Novation controller keyboard and USB memory stick would all work individually when plugged into any of the four USB box sockets but plug any two devices in and neither would work?
I then had a replacement device sent to me with exactly the same results. This was with Windows 10 so I tried the Linux partition on the same laptop with the same results.
I then tried the USB box on my other laptop with exactly the same results, each individual socket would work with any of the devices but when I plugged a second device in neither would work?
I opened up one of the USB boxes and found that the USB lead was just connected to the four USB sockets all wired in parallel.
I had read that these passive USB expanders sometimes wouldn’t work if one of the devices was using too much power and that in that case you should use a powered device. These were similar except had a 5 volt adapter powering the USB bus instead of the laptop. So I wired in a 5v supply from my bench supply and disconnected the 5 volt connection from the laptop.
Same results, any one device worked perfectly but connect up another and both would stop working with a message on screen about USB device not functioning?
Do these boxes not work? Has something changed to stop them working. I’m puzzled, I can’t be the only one to find these problems. With two different boxes, and just to confirm I checked each box was correctly wired with a multimeter as I thought it could be a batch wiring error or something but they were fine. So different boxes, different operating systems, two different laptops and four different USB devices. I saw a USB expansion board on eBay that had a four sockets but associated electronic circuitry. This worked perfectly so do any of these other boxes work? Like I say I’m puzzled as to why I seem to be the only one with problems especially after I couldn’t conclude anything else other than the four sockets wired to one plug doesn’t work so why has nobody else said this? There are two wires for 5 volts, a plus and a minus and two cables for the data signal and while I’m OK with the 5 volts being shared surely data signals from two devices can’t just be connected together?
Things to be aware of if you make something from a broken laptop
If you want to have USB sockets somewhere, I decided to include a couple on the back panel, you’ll find it easier to use an adapter than try to have the laptop motherboard anywhere near where you can put a hole for the socket. Using a double USB extender socket you can put them where you like as long as you make sure you get one with the required lead length.
For the mains power, I decided to use an IEC plug. These are the ones like kettle plugs. The leads are readily available and once you’ve mounted the socket you don’t have to worry about strain relief or grommets. You can then just cut the mains plug off your laptop power adapter and strip the wires back, solder them onto the IEC socket and put some heat shrink tubing over the whole soldered terminal so there’s no exposed mains connections.
The Novation controller keyboard has had the main board that contained the control panel removed and the variable resistors have been de-soldered. My front panel will then have eight variable resistors mounted on it with the wiring going back to the Novation board.
When you are handling the laptop without a case be very aware that it can be easily damaged by static electricity. To make sure this doesn’t happen, check out my article and get an anti-static wrist strap.
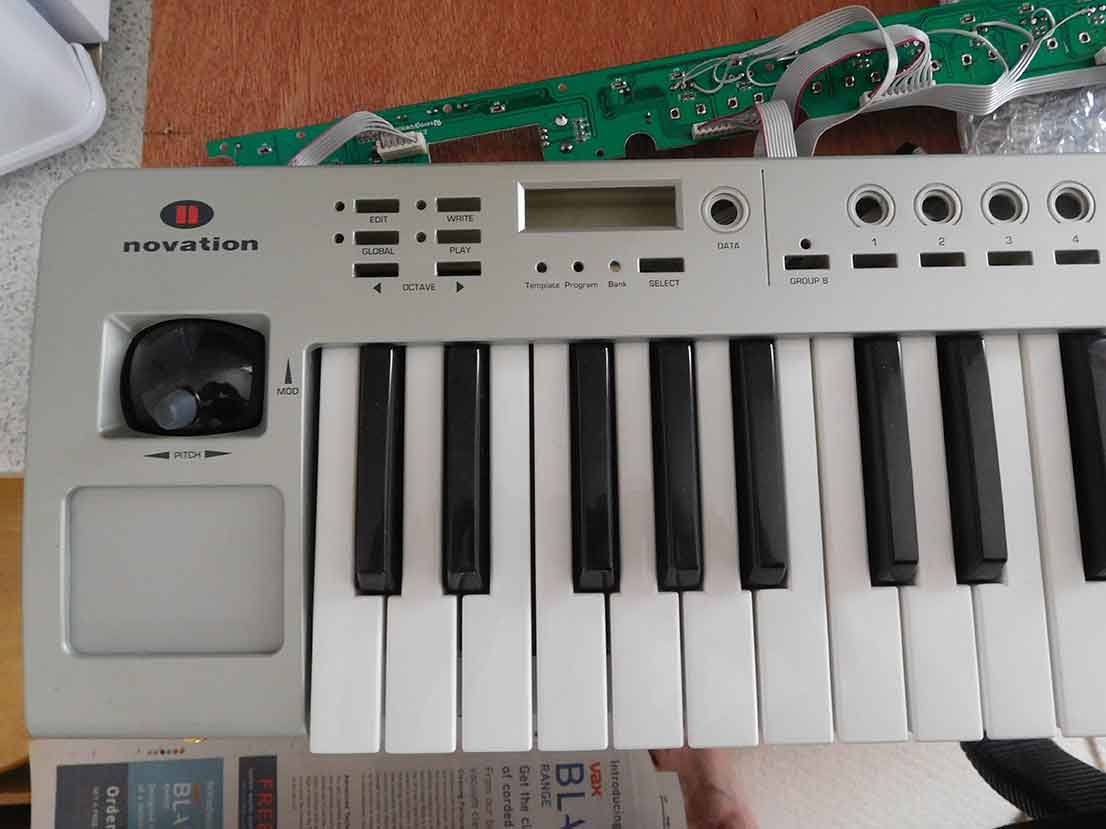
Problems I encountered re purposing my broken laptop
Apart from the USB splitter problems which I sorted by using another device, another problem I had was with the power on button on the laptop. With the laptop being mounted to the bottom of the keyboard case, it was nowhere near the back panel where it needed to be. The actual button was a tiny surface-mounted device (that means it’s soldered directly to solder pads on the top of the circuit board as opposed to having legs that go through holes to be soldered on the back of the PCB) as it is on most laptops these days, so I decided to mount a push button switch on the back panel and wire it to the surface mounted switch on the laptop motherboard. There was just enough solder showing on the corners of the switch to solder two fine wires to and then to the push button on the back panel. This worked while I was wiring the rest of the parts but unfortunately, the wire came off the button on the laptop motherboard.
It later became apparent that it was much more serious than I had thought as the surface mount push button on the laptop’s motherboard would no longer turn the laptop on.
Upon closer inspection, the wire I had soldered to the corner of the push-button had pulled off a pad and track.
I confirmed this was the problem by finding the laptop’s circuit diagram and finding the connection that needed to be momentarily grounded to start the laptop.
So how was I going to get the laptop to power and boot now?
Well, I grounded the pin with a wire to start the laptop and went into the bios where I was able to alter the power startup to get the laptop to start when it got power from the adapter. So that was how I got around it. To be honest I wished I’d done that in the first place and left the power button alone. So now the laptop starts when you plug the whole machine into the mains supply and it turns off through the normal menu in Windows.
In the future, I’m going to look at hibernating the laptop and starting it up with the keyboard through USB in the bios.

The LCD screen was lined up with the front panel cut out and screwed into position with the LCD controller board mounted alongside.

The picture above shows the Novation controller keyboard sprayed white, mounted on a plywood base with the laptop and the circuit board from the Novation.

This is how the MDF case lines up with the base.


Almost everything is fitted inside the case, including a power amplifier module, which runs from the same 12 volts power supply that runs the LCD controller board.

Almost finished, I’ve yet to finalise mounting the USB in and MIDI out sockets on the back panel, the front panel potentiometers, keyboard transposition buttons, and the power amplifier volume control, which will mount onto a panel that will fit over the narrow oblong slot and I’ll make a couple of end panels to finish it off, probably painting them black.