

There seems to be loads of cheap locking push button switches available on the internet but hardly any momentary ones. Locking ones are the types that you push and they click to turn on, you push it again and it clicks and turns off. Momentary ones only turn on while you press them in, as soon as you release your finger off the push button they turn off.
When I did finally find some momentary push buttons I was most disappointed to discover they had been wrongly advertised and in fact were locking ones. I had bought some square push button switches years ago from Maplin which came in locking and momentary types so I thought it was time to do a bet of dissembling and investigating to see what I could learn.
I found out that you can modify some locking push button switches to be momentary ones.
First thing I noticed was that the old Maplin and internet sourced push buttons had something in common. A line around the bottom near the terminals. Next thing I noticed was that you could unscrew this bottom section. Before you go ahead and try to unscrew it you need to know the important fact that it contains springs and bits will fly out everywhere so you need a small tray of some sorts to contain everything, also doing it slowly helps. It will also help you to see where everything goes back in to reassemble it. Taking a picture with your smart phone is also a smart move.

You can just make out the line where the switch unscrews.
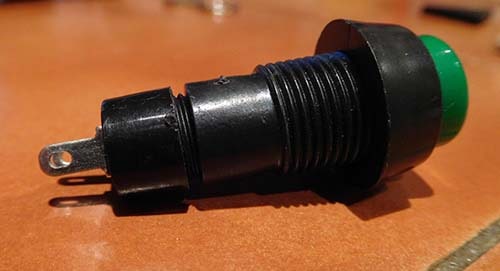
You can see more clearly in the picture above as I’ve started to unscrew it.

Carefully unscrewed and you can see the internal components.
You will find that there are two springs inside, some plastic parts and a metal washer shaped part, this is the bit that makes the contact between the two terminals. After taking apart a latching and momentary version of the push button I realised that all of the internal parts were the same except the plastic part that sits on the top, furthest away from the contacts. 
The bottom section removed from the rest of the switch

The internal components of the push button switch, notice the two springs and the metal washer type thing that makes the electrical contact.

You can see in the picture above, the plastic component that is to be modified, you can see the four plastic “squares” around the collar that aren’t present on the corresponding part on a momentary push button.
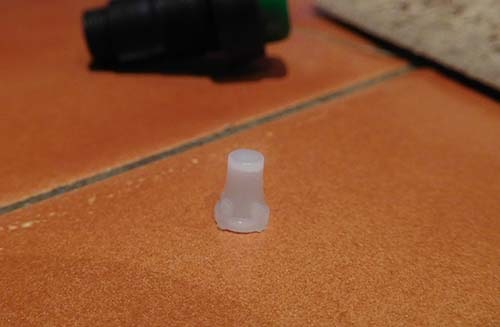
The picture above shows the part after being trimmed with side cutters to remove the plastic “squares”.

The picture above shows the positions of the internal components ready to be assembled.
On the momentary switch it was a smooth tube shape part, on the locking or latching versions it had four plastic squares around the collar. Swapping these between the switches confirmed that this was the component that made all the difference between whether a switch locked or not. If you trim these four plastic squares away with side cutters and reassemble the switch you will now have converted it from latching to momentary. Sometimes you can feel it trying to latch and if you unscrew the mechanism you will notice that you haven’t quite cut enough of the plastic squares away. To be honest I’m not entirely sure how they latch because of the extra corners but I do know without them they won’t, which is enough for me today.